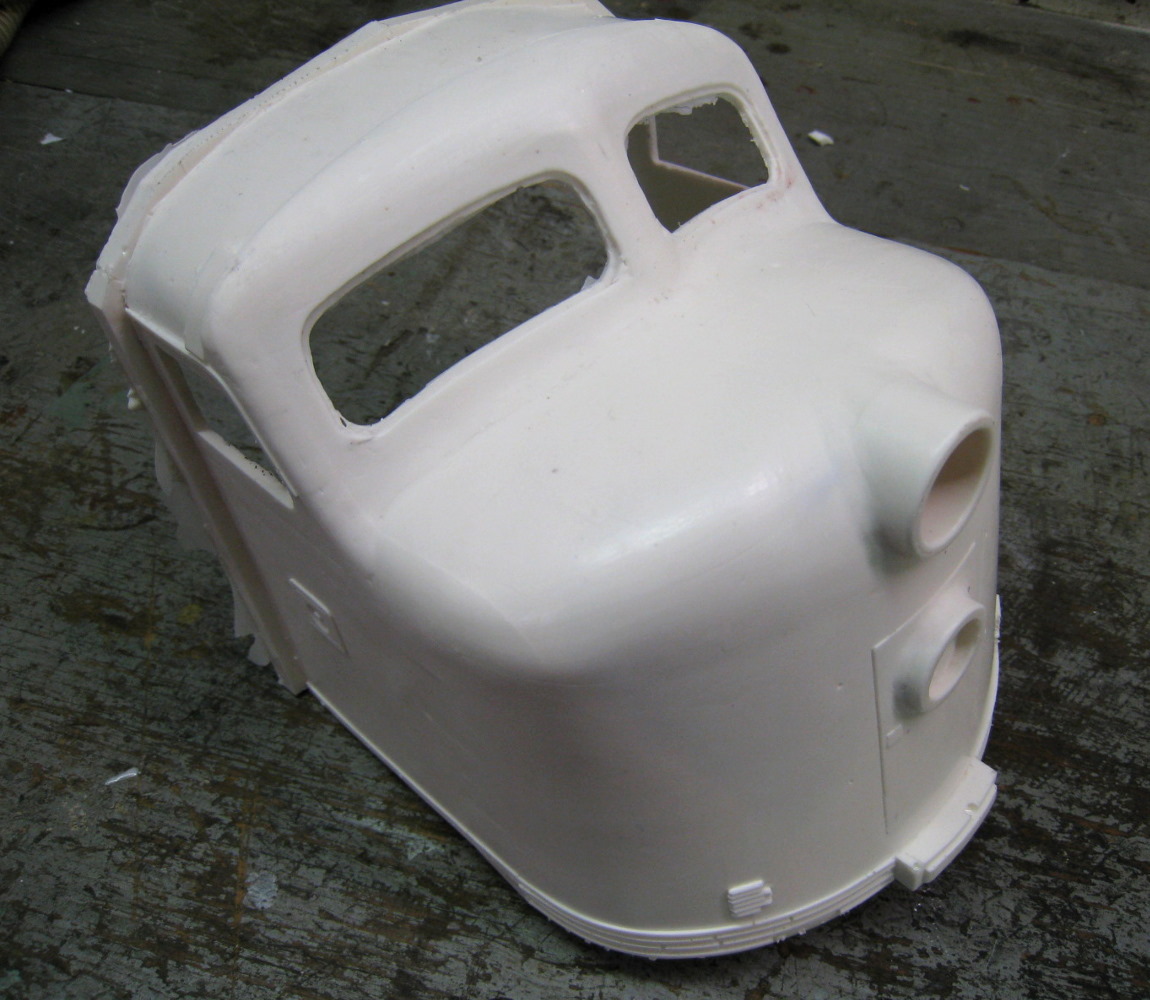
The F 3 Nose Casting
Barry created his own master, then mold, for the F3 nose.
|
|
|
|
|
|
|
|
|
|
< Slideshow > <
Return > to the F 3 photo section Created 1/22/09
Words from Barry on progress:
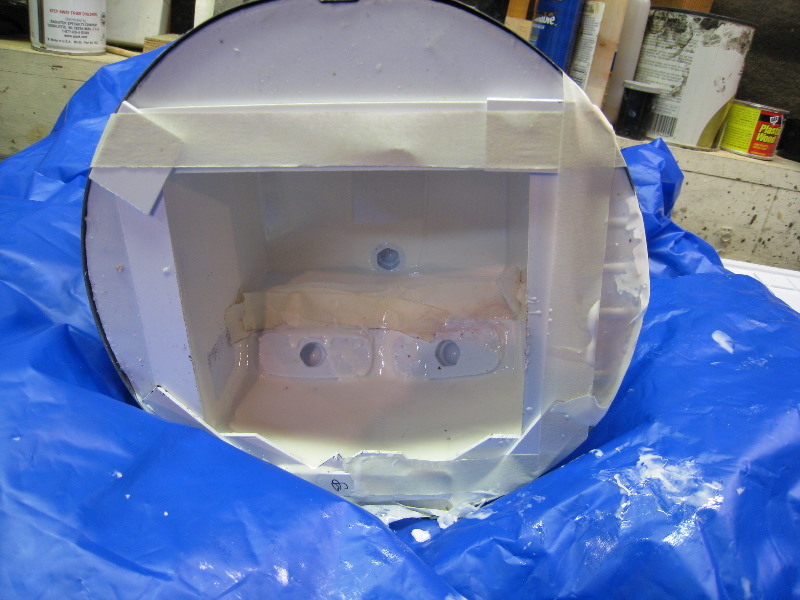
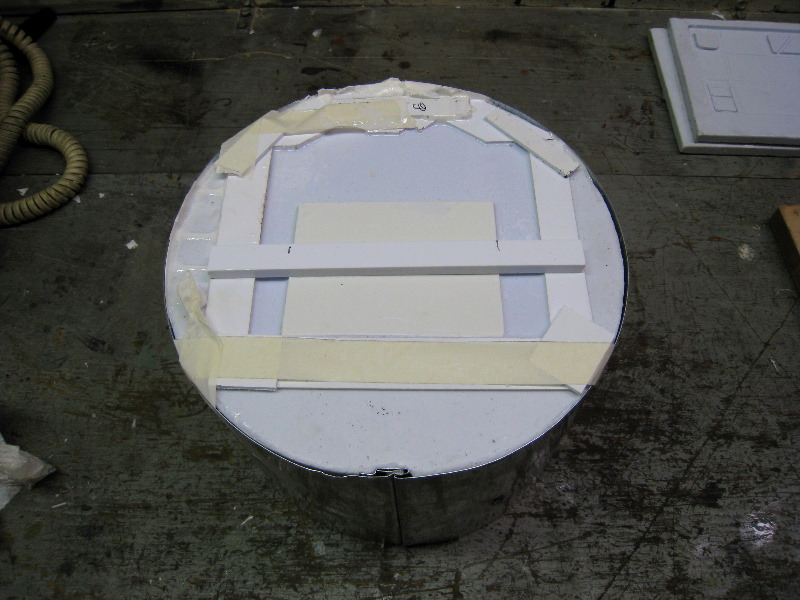
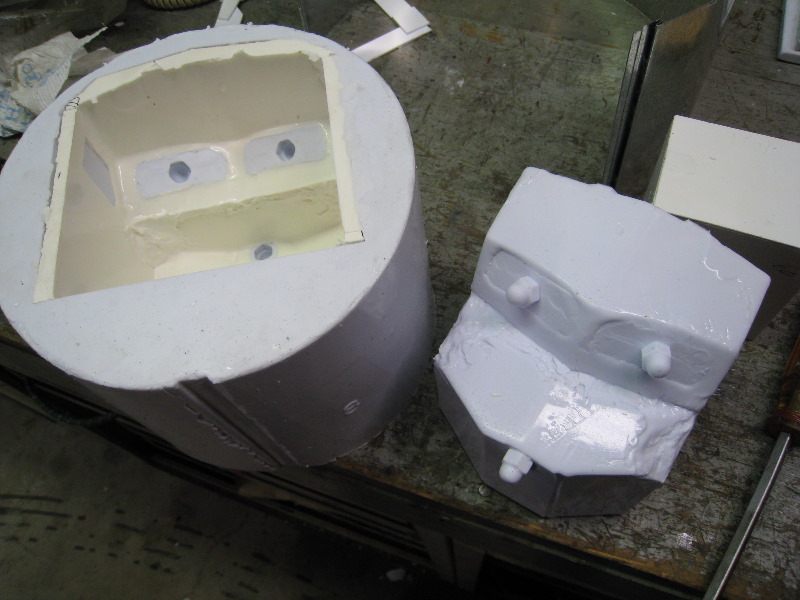
Above are
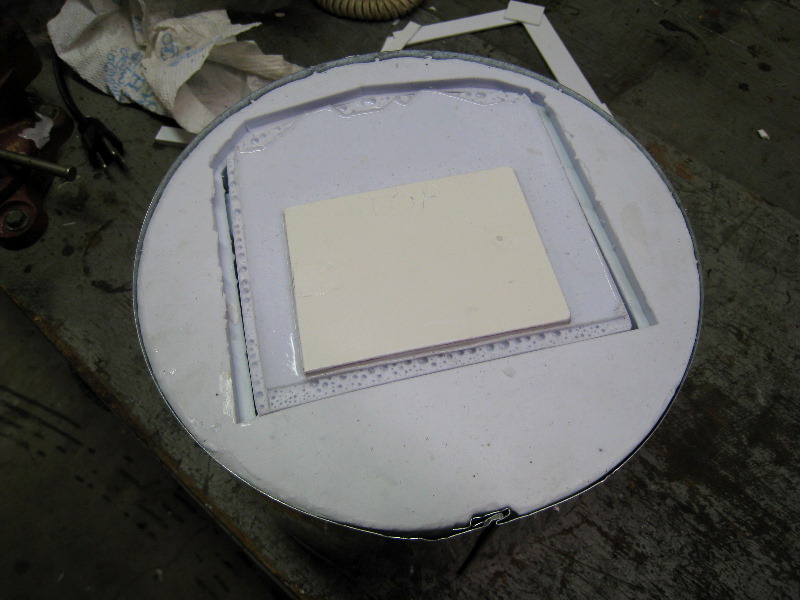
the F unit nose casting and molds. The mold cost well over $100 to make! I used
a piece of 8" stove pipe, so that it would fit in
my
pressure pot. I filled the master up with plaster on the back side of it and
placed it in the bottom of the pipe, with a piece of plastic glued
to the
bottom of the pipe, to seal it off. I then poured the rubber over the top of
the master and added some old, cut up molds, to it so that
I did not
have to use up as much new rubber. Once it set up, I pulled the master
out and reassembled the pipe, less the bottom around the
mold. I
poured a small amount of urethane on every face of the mold and so to build up
the thickness of what I wanted the castings to be.
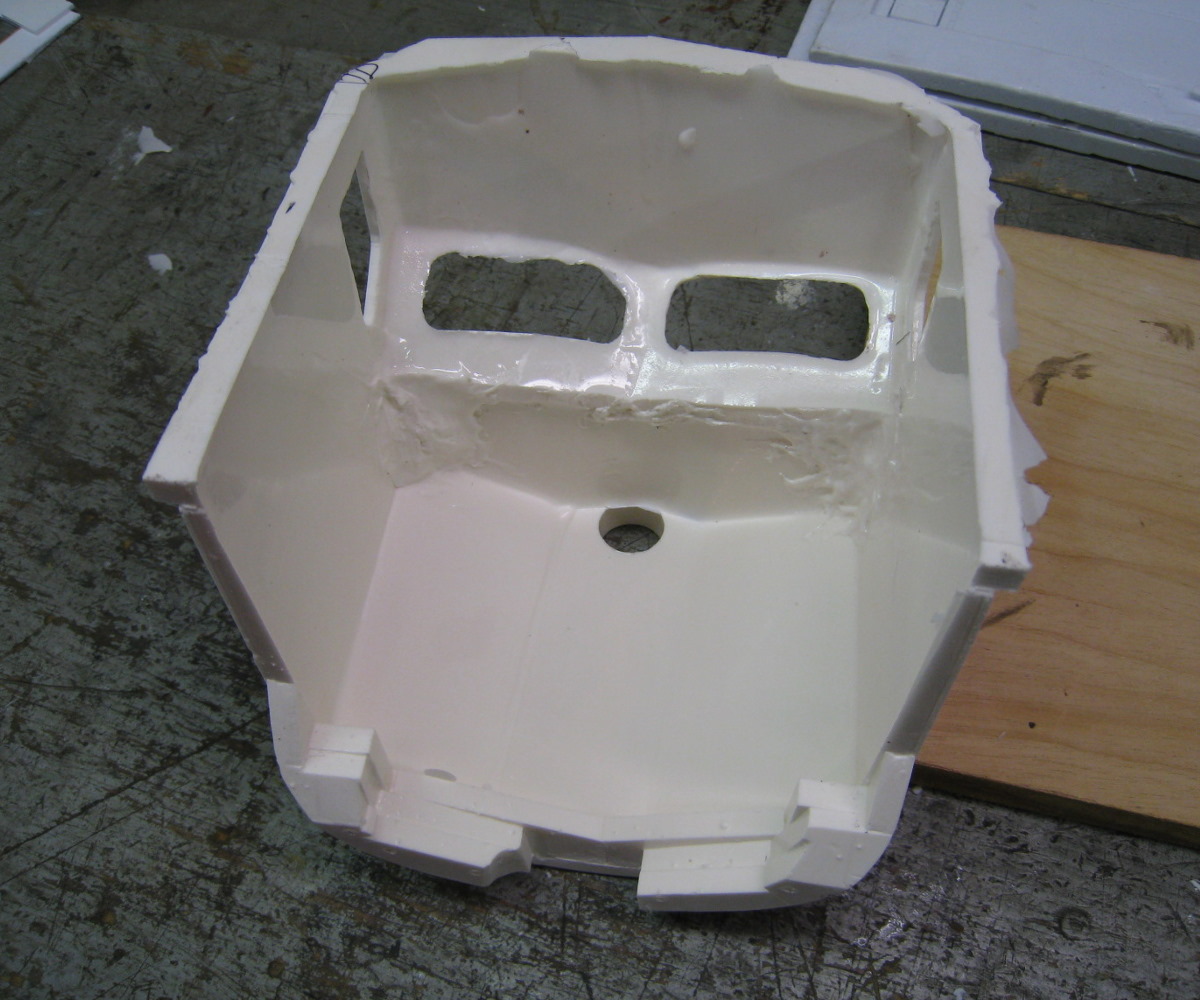
It took
about 10 pours to get everything covered at the right thickness. I had to make
a make shift dam in the mold out of tape, to build up
the front
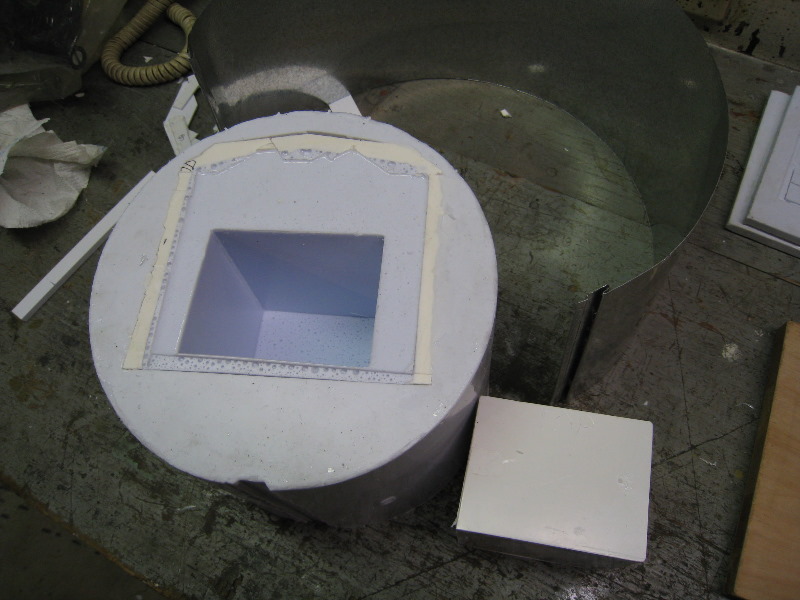
window areas. Once finished, I poured the inner mold, with a box in the center.
This box comes out and then I can collapse the
inner
mold and pull it out from the finished casting. I did not vacuum the inner mold
and it is filled with air pockets on the surface. I did not
want to
collapse the box in the middle and since it is on the inside of the casting, it
is no big deal if the casting is rough in that area.