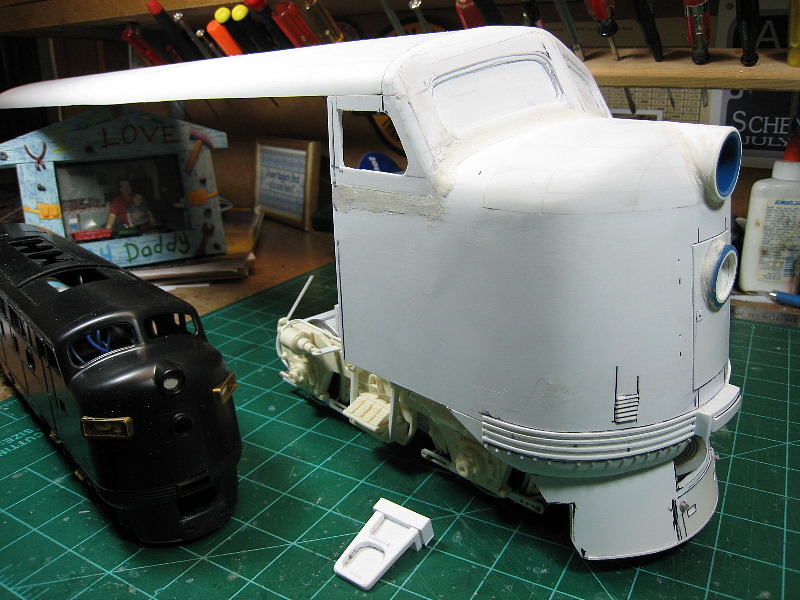
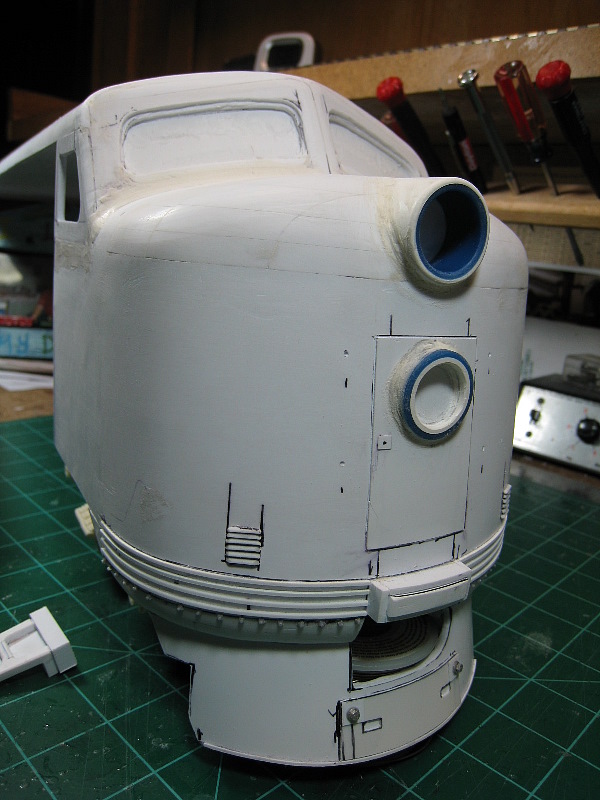
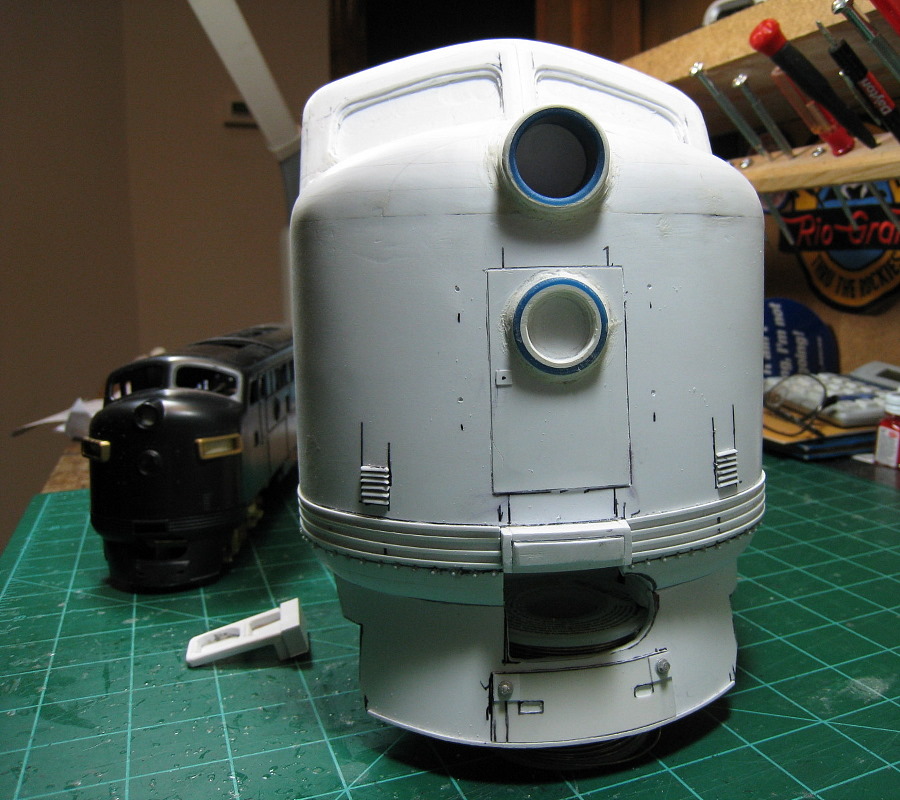
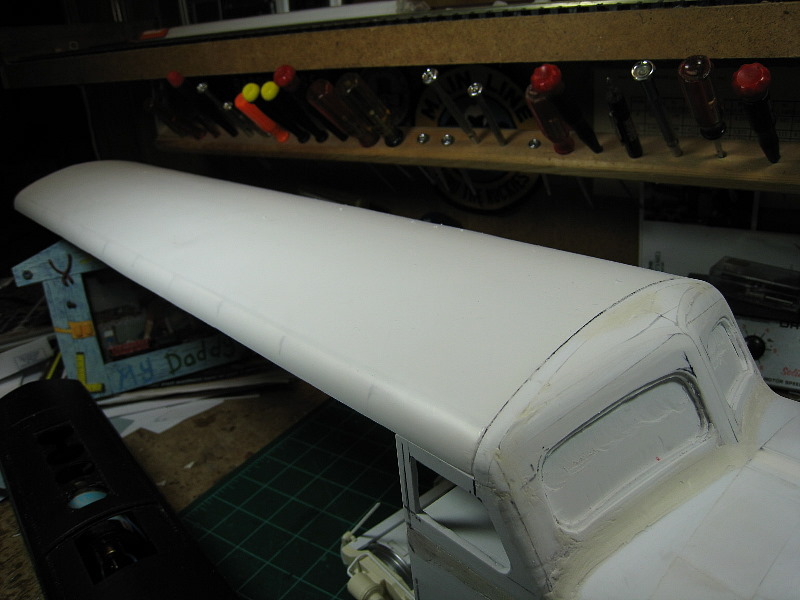
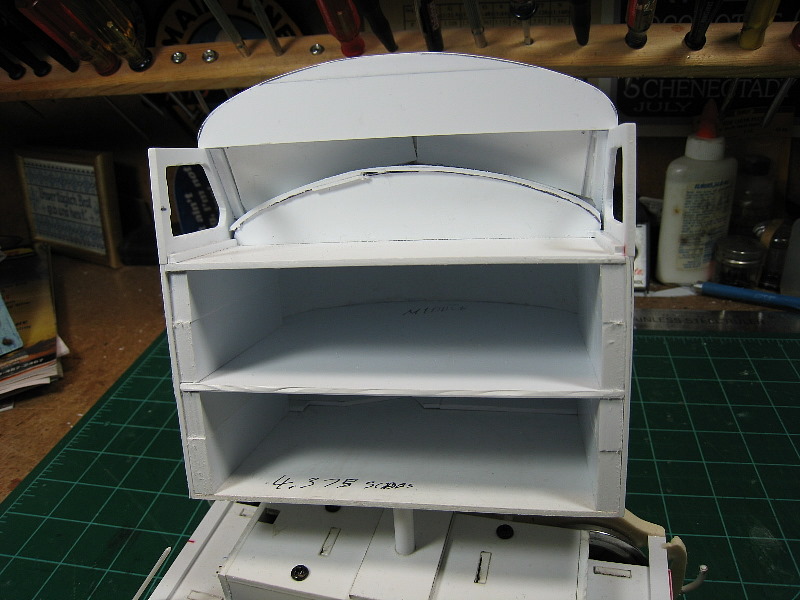
Work on the F Unit Nose & Cab
Progress on the nose continues with
adding the cab
|
|
|
|
|
|
|
|
|
|
< Slideshow > <
Return > to the F 3 photo section Created 12/14/08
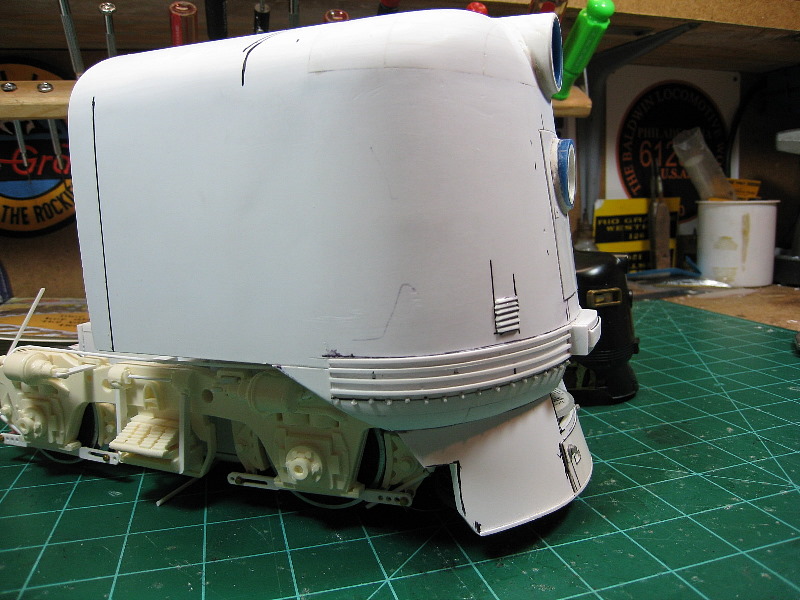
Words from Barry on progress:
This he latest progress from
the Bogs Locomotive Works shops. After many hours of work and inspections, I am
pleased to show you the roughed in
F unit nose. There is still
much more to be done to it, including details and final pudding and sanding.
This has been one of the most difficult projects that
I have attempted to build.
There are just so few square corners to work off of. Thanks to
F unit to work off of. Once
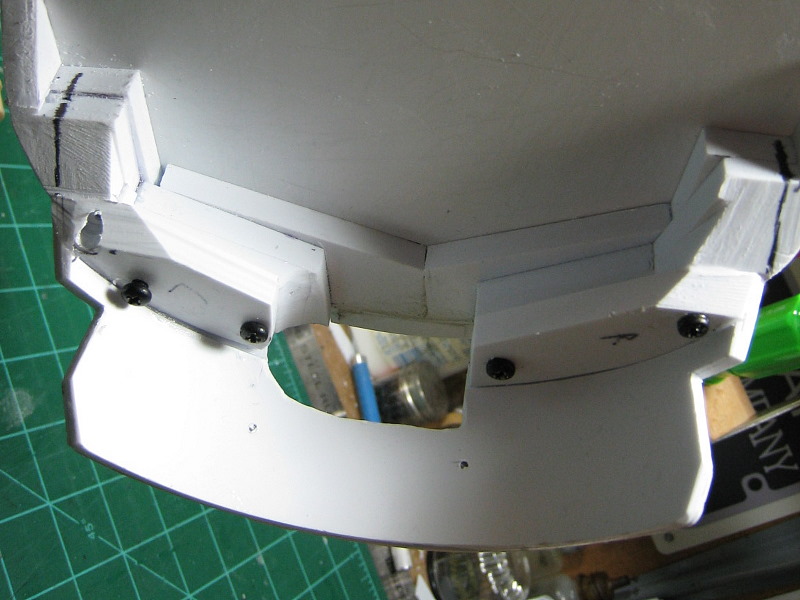
I get the master done, I will fill the back of it solid with plaster or clay
and then build a box for it to rest in. Oh course the
pilot will be off of it and
all the holes will be filled when I pour rubber over it. Once the outside mold
is done, I will remove the master and turn the mold
over. A little at a time,
and at different angles I will pour resin in the mold to make the casting about
3/16" thick. I will then fill the interior with rubber
and a plug to make the outside
mold. I will use plastic strips to hold the two molds apart when I pour the
keeper castings. I will cut a few screws off the
casting and glue it to the
rest of the sides and roof, to make the body from there. You get the idea, very
labor intensive. This thing makes any steam loco
project, a piece of cake!